mardi 15 septembre 2026

How to Access the Tow Hook

by


How to Access the Tow Hook


The exact procedure varies between vehicles, but the general process looks something like this:

1. Locate the Small Bumper Cover

Look for the small removable panel on the front or rear bumper, depending on where your vehicle's recovery point is located.

It may be nearly invisible when you're standing a few feet away.

Some covers have a tiny notch or indentation that indicates where they're meant to be opened.

2. Check the Owner's Manual

Before reaching for a screwdriver, check the instructions for your specific vehicle.

Some covers can be gently released with a fingertip or a small plastic trim tool. Others may require a particular procedure.

Don't force the panel.

It's easy to scratch the paint, break a plastic retaining clip, or damage the bumper cover if you pry in the wrong location.

3. Remove the Cover Carefully

Once you've identified the correct panel and the recommended release point, remove it according to the manufacturer's instructions.

Set the cover somewhere safe so it doesn't get lost while you're dealing with the recovery situation.

And yes, this is one of those tiny pieces that suddenly seems incredibly important when you're stuck somewhere!

4. Retrieve the Tow Hook


see continues on thenext page

[page] 


How to Access the Tow Hook


The towing eye or recovery hook is often stored with the vehicle's emergency equipment.

Depending on the vehicle, it may be found:

  • Under the trunk floor
  • Beside the spare tire
  • Inside a tool kit
  • In a compartment near the jack
  • Under a cargo-area panel
  • In a dedicated storage pouch

The hook is usually a metal piece with a threaded end.

5. Locate the Mounting Point

Behind the bumper cover, you'll typically find a threaded mounting point designed to accept the towing eye.

This is the important part: use only the designated recovery point.

Don't attach a tow strap, chain, or other equipment to an arbitrary piece of the bumper, suspension, or bodywork.

6. Screw in the Tow Hook

Thread the towing eye into the mounting point by hand.

Make sure it is properly aligned and fully engaged according to the instructions in your owner's manual.

If it doesn't thread in easily, stop.

Don't force it or use the wrong hardware.

A properly designed recovery point is engineered for this purpose, while a random attachment point may not be.

7. Use the Correct Recovery Procedure

Once the tow hook is installed, the actual recovery or towing procedure depends on the vehicle.

This is especially important with modern cars because some vehicles have specific requirements for towing, loading onto a flatbed, or recovering a vehicle from difficult terrain.

Some vehicles should not be towed with their driven wheels on the ground at all.

Always follow the manufacturer's towing instructions.

What Is the Tow Hook Actually Used For?

The towing eye is primarily there to provide a strong, designated attachment point for moving or recovering the vehicle when necessary.

That might mean helping move a disabled vehicle onto a recovery truck or allowing a properly equipped recovery professional to pull the vehicle to a safer location.

It's not simply a convenient metal loop for everyday use.

And it's definitely not something you want to improvise with.

Tow Hook vs. Trailer Hitch

These two things are easy to confuse, but they serve different purposes.

A tow hook or towing eye is generally designed for vehicle recovery.

A trailer hitch is designed for towing an appropriately equipped trailer or other approved load.

Having one doesn't automatically mean you can use the other for the same purpose.

Why Is the Tow Hook Hidden Behind a Panel?

At first, the little bumper panel can seem unnecessary.

Why not just leave the attachment point exposed?

There are several practical reasons.

The covered design allows manufacturers to keep the bumper looking clean and streamlined while protecting the mounting area from everyday dirt, water, and road debris.

It also means the recovery hardware doesn't have to remain visibly attached when you aren't using it.

From a design perspective, it's a clever compromise.

You get the emergency equipment when you need it without having a large metal hook permanently hanging from the bumper.

Why So Many Drivers Don't Know About It

Honestly, I don't blame anyone for missing this feature.

Modern cars are full of hidden compartments, access panels, sensors, emergency tools, and cleverly integrated hardware.

Most of us don't read the owner's manual from cover to cover after buying a vehicle.

We figure out where the fuel door is.

We find the windshield-wiper controls.

We adjust the seats.

And then we get on with our lives!

The towing eye is different because you may not need it for years.

Then one day you find yourself with a disabled vehicle and suddenly you're wondering:

“Where on earth is that tow hook?”

That's why learning where it is before an emergency can be surprisingly useful.

What If You Can't Find the Tow Hook?

Don't assume your vehicle doesn't have one.

Check:

  1. The owner's manual
  2. The trunk or cargo-area storage
  3. The spare-tire compartment
  4. The jack and emergency-tool kit
  5. Any labeled towing or recovery compartment

Some vehicles use different recovery systems, and some have equipment that is stored separately.

If you're still unsure, contacting the vehicle manufacturer, dealership, or a qualified roadside-recovery professional is safer than guessing.

Important Safety Tips

A towing eye is useful, but vehicle recovery can be dangerous.

Never Attach to an Unknown Point

A bumper cover itself isn't a structural recovery point.

The designated mounting point is there for a reason.

Don't Use a Damaged Hook

If the towing eye is bent, cracked, badly corroded, or otherwise damaged, don't use it.

Don't Exceed the Vehicle's Limits

The recovery equipment and vehicle have limitations.

Check the manufacturer's instructions before attempting any recovery.

Be Careful Around Moving Vehicles

Never stand in the path of a vehicle being pulled or pushed.

Recovery straps and other equipment can also store significant energy when under tension.

Use a Professional When Necessary

If a vehicle is stuck, damaged, or in an unsafe location, roadside assistance or a professional recovery operator is often the safest option.

A few minutes of professional help can be much cheaper than damaged bodywork—or an injury.

Is the Tow Hook Always in the Front?

No.

Depending on the vehicle, the designated recovery point may be located at the front, rear, or both.

Some vehicles have separate attachment points for different situations.

That's another reason not to assume that every car works the same way.

Can I Leave the Tow Hook Installed?

Generally, the towing eye is intended to be installed when needed and removed afterward, with the bumper cover replaced.

However, the correct procedure depends on the vehicle.

Follow the instructions in your owner's manual rather than relying on a generic method.

What If the Small Panel Won't Come Off?

Don't force it.

The panel may have a specific release point, clip arrangement, or removal procedure.

Using a screwdriver or other sharp object in the wrong place can easily damage painted plastic.

Check the owner's manual for the correct method first.

A Tiny Panel With a Surprisingly Important Job

It's funny how many parts of a modern car we never think about until we need them.

That little bumper panel is a perfect example.

When everything is working normally, it simply blends into the design.

You might walk past it hundreds of times without giving it a second thought.

But behind it could be the mounting point for one of the vehicle's most useful emergency features: the designated towing or recovery attachment.

So the next time you notice that small, perfectly shaped panel on your bumper, you'll know it isn't necessarily just decorative.

There may be something very practical hiding behind it.

And if you've never checked your own car, now is a pretty good time.

Take a few minutes to look through the owner's manual and find out where the towing eye is stored and how the recovery point works.

Because learning where something is before you need it is always better than trying to figure it out when you're stranded on the side of the road!!



Doctors Explain Why Eating Eggs in the Morning May Be Better Than You Think

by


Doctors Explain Why Eating Eggs in the Morning May Be Better Than You Think


For years, my breakfast routine was simple: a bowl of cereal, a splash of milk, and a rush out the door. It was fast, easy, and seemingly harmless. Yet by mid-morning, I would find myself hungry, irritable, and reaching for whatever snacks were within reach. I assumed this was normal—that everyone experienced the same pre-lunch energy dip.

That changed during a routine physical.

After reviewing my blood work, my doctor asked a straightforward question:

“What do you eat for breakfast?”

When I told her, she paused, then offered a simple suggestion I would never forget.

“Try eating two boiled eggs every morning for the next month. Don’t change anything else. Just add the eggs. Then come back and see me.”

I was skeptical.

Boiled eggs seemed unremarkable. Even boring.

But I committed to the experiment. Every morning, two eggs, boiled the night before, eaten at my desk.

The shifts were subtle at first.

After a week, I noticed I wasn't ravenous by ten o'clock. After two weeks, my afternoon craving for sweets seemed less intense. And after a month, I had noticed changes in my eating habits that I hadn't expected.

Now, there is an important part of this story worth clarifying: eggs aren't a magic weight-loss food, and eating two eggs every morning won't automatically improve everyone's cholesterol or blood work. Nutrition research is much more complicated than that.

But there is a reason eggs have earned their place on so many breakfast tables.

They're rich in high-quality protein, they're convenient, they're filling for many people, and they can be part of a heart-healthy eating pattern.

And honestly?

Once I understood what was happening, my boring little boiled eggs didn't seem quite so boring anymore.


see continues on thenext page

[page] 


Why Eggs for Breakfast May Actually Help You Feel Fuller

One of the biggest reasons eggs can work so well at breakfast comes down to protein.

Protein tends to be more filling than many refined-carbohydrate-heavy breakfast choices. And eggs provide a high-quality source of protein along with other nutrients.

Several controlled studies have found that egg-based breakfasts can increase feelings of fullness compared with certain lower-protein or refined-carbohydrate breakfast meals. However, the results aren't identical in every study, which is why it's more accurate to say eggs may help with appetite control rather than claiming they suppress hunger for everyone.

That distinction matters.

Your breakfast isn't operating in isolation. What you eat later, how much you eat overall, your sleep, activity level, food preferences, and your individual metabolism all matter too.

Still, if a protein-rich breakfast helps you stay satisfied until lunch, that's a pretty useful advantage.

Eggs Can Be Surprisingly Nutrient-Dense

An egg may look tiny sitting on your plate, but there's quite a lot packed inside.

Eggs provide:


lundi 14 septembre 2026

Ras El Hanout and chocolate chunk pumpkin bread

by


Hello world! It has been a little while, I can’t  believe I shared my previous post almost 18 months ago. These past 18 months have been *interesting* to say the least… 

On a personal note, we welcomed our second baby girl to the world and have been enjoying spending time as a family of four which makes us feel extremely lucky and blessed! 

On a more general note, the world is a very different place today, we can’t shake people’s hands anymore (!!) and everytime we leave the house, we must not forget our masks.

It’s a weird time to be alive but the good news is, we can still cook and bake and make our bellies happy! 

This pumpkin bread is very earthy, fragrant, lightly sweet, not too heavy and very addictive! I could not help but adding chocolate chunks to it but feel free to discard them from the recipe if you don’t want them.

The Ras el hanout sugar on top of the cake is optional but I guarantee that it’s totally worth the extra 3 minutes and calories, it gives the bread a delicious crumb that really bring this bread to another level!

Do you think by the time I write my next blog post we will all be able to hug each other? I guess not, so in the meantime I am sending you a huge virtual hug with this comforting Ras el hanout and chocolate chunk pumpkin bread.

IMG_3708.jpg


see continues on thenext page
[page] 


INGREDIENTS

  • 260g plain flour

  • 1 1/2 teaspoons baking powder

  • 1/2 teaspoon baking soda

  • 2 teaspoon ras el hanout

  • 1 teaspoon salt

  • 180g brown sugar 

  • 2 large eggs

  • 120g butter, melted and more for buttering the pan

  • 60ml black tea (black tea bag soaked in hot water)

  • 2 teaspoons vanilla extract

  • 320g pumpkin puree

  • 140g dark chocolate chunks or chips

Ras el hanout sugar (optional)

  • 3 tablespoons caster sugar

  • 1 teaspoon ras el hanout

METHOD

• Preheat the oven to 180C (350F). In a large bowl, whisk the flour, baking powder, baking soda, ras el hanout and salt together until combined. 

• In another bowl, whisk the eggs and brown sugar together until well combined. Add in the melted butter, black tea and vanilla extract and whisk until combined. Add in the pumpkin and whisk again until combined. 

• Pour the dry ingredients into the wet ingredients and gently mix together using a spatula. Do not overmix the batter because this will make the bread gummy (it’s totally fine if we can still see some flecks of flour in the batter). Gently fold in the chocolate chips.

• Butter a loaf pan (21.5 x 11.5 x 7 cm / 8.5" x 4.5" x 3") and pour the batter into the pan. Use a spatula to gently spread the cake mixture evenly over the pan. Sprinkle the sugar all over the bread making sure you also put some in the corners.

 • Bake for 50 to 60 minutes or until a toothpick inserted in the center comes out clean with  a some small moist crumbs.

 • Allow to cool completely on a wire rack before removing from the pan.


Lamb Tagine with Prunes

by


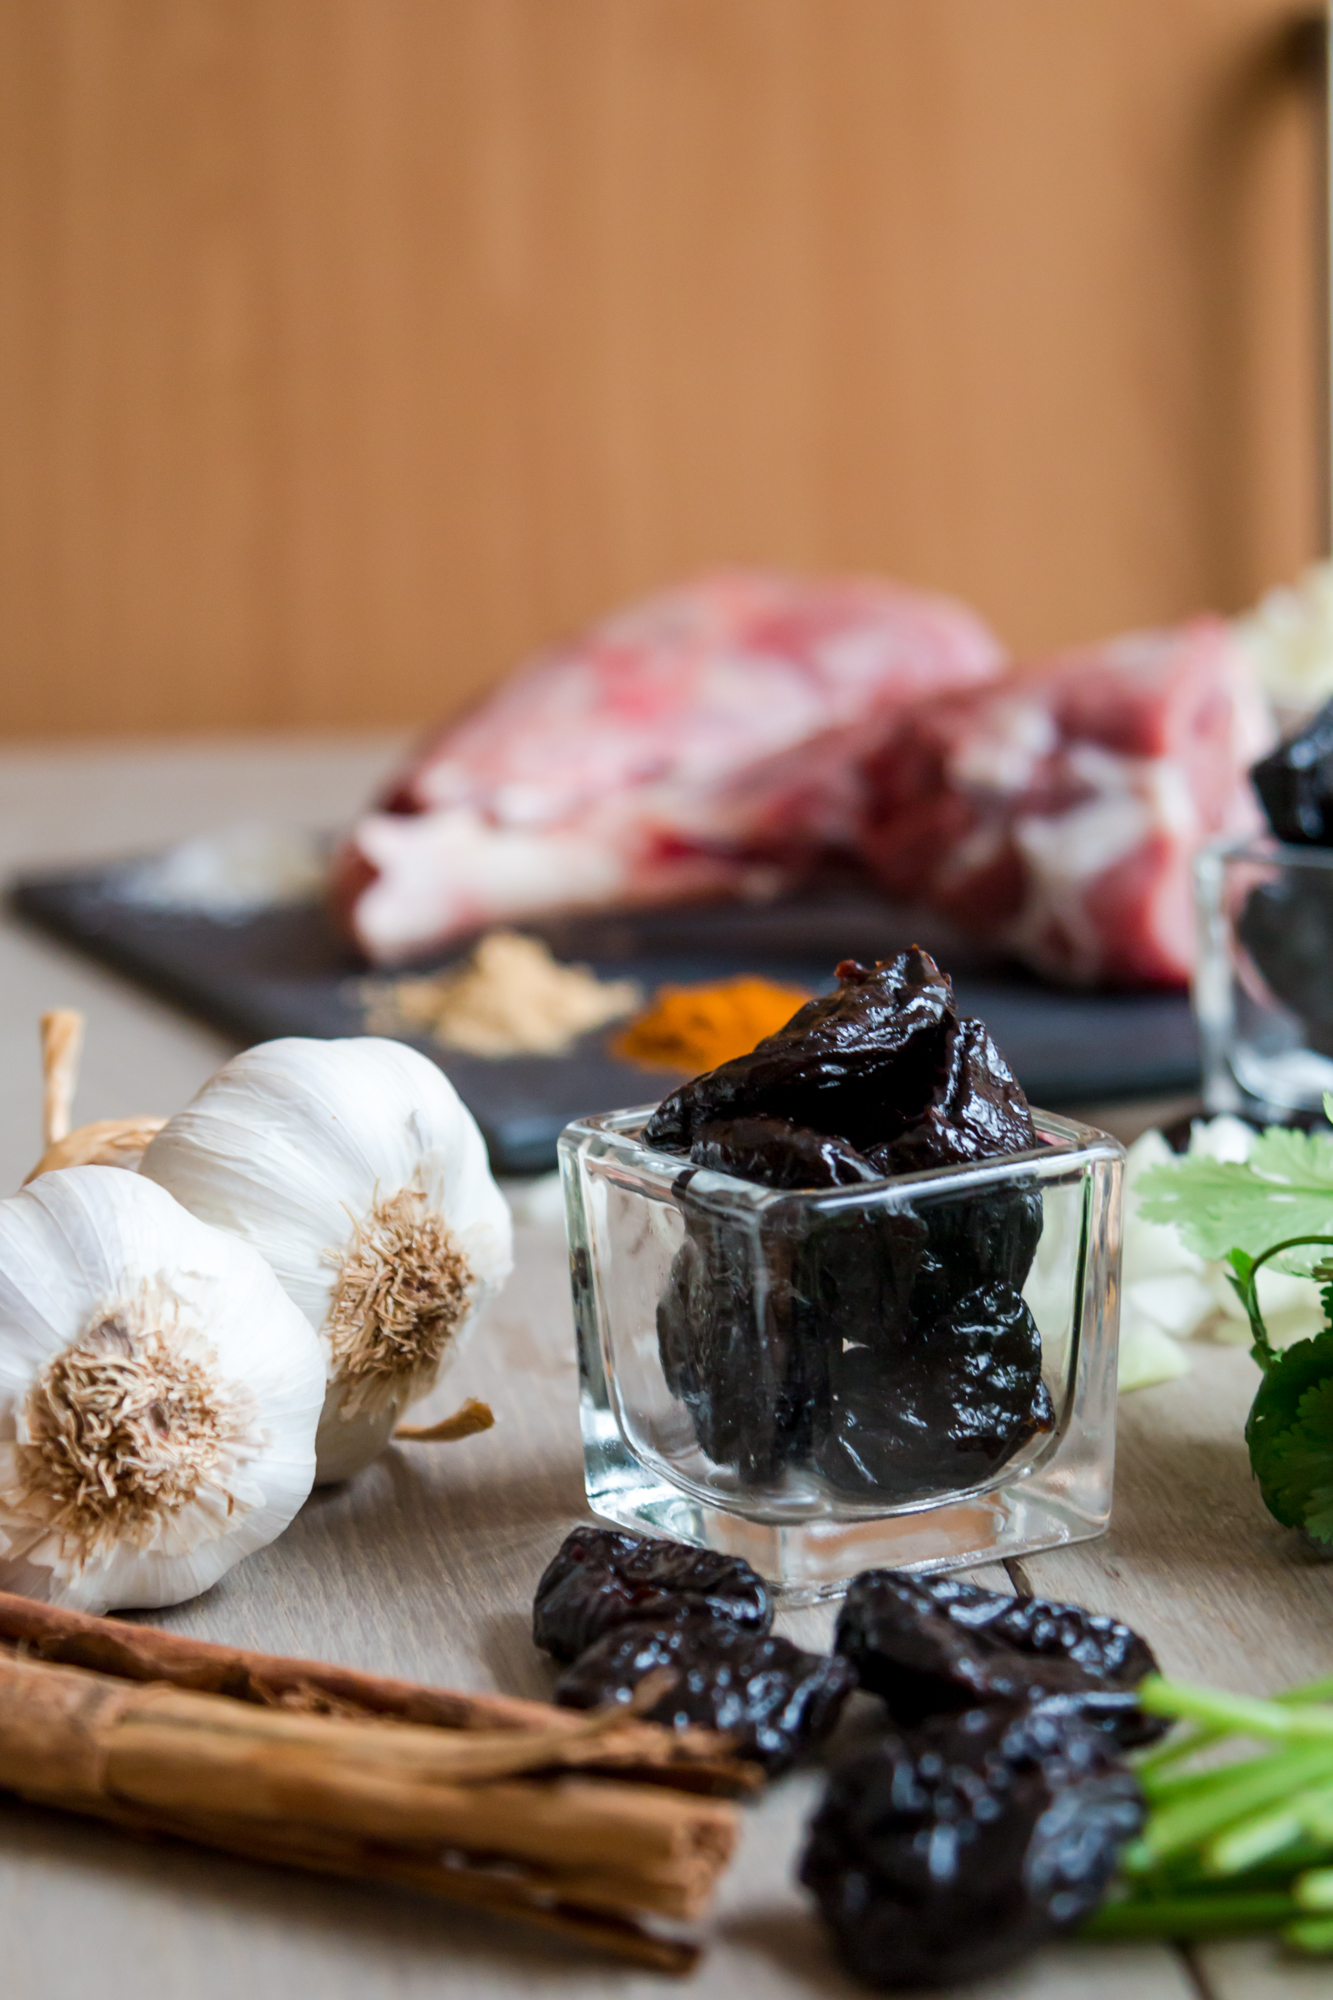
Yay! The legendary Moroccan meat tagine with caramelised prunes is finally on the blog. What took me so long!?

This is one of my favourite sweet and savoury Moroccan dish because I find that the various flavours of this tagine beautifully balance each other. The sweet and caramelised prunes work perfectly with the deep and richly spiced meat and onion sauce.

You will find a lot of different recipes of this tagine online. The one I am sharing with you today is a very authentic version but also the the way I like it. I tend to use more onions because I like to have a thick sauce. And you know, more sauce always means more pleasure and yumminess. Also, some of the recipes don’t advise to cook the prunes separately; there is nothing wrong with it. The reason why I think it’s better to cook them separately is because this allows to caramelise the prunes properly and also prevents the whole dish from turning brown/black-ish.

Everyone should try this all time classic at least once throughout their life! It is divinely tasty and it will make your taste buds travel somewhere warm and colourful!

Enjoy with a side of couscous or crusty bread.


see continues on the next page
[page]


INGREDIENTS

Serves 4 to 6

Tagine

  • 2 tablespoons olive oil

  • 1.2kg lamb shanks trimmed of excess fat (about 4 small or 3 large shanks) - check notes for other types of meat 

  • 4 large onions (about 800g), chopped

  • 1 tablespoon finely chopped garlic (about 4 cloves)

  • 1 teaspoon ground turmeric

  • 1 teaspoon ground ginger

  • 1 teaspoon salt or more to taste

  • ¼ teaspoon ground black pepper

  • ¼  teaspoon saffron

  • 1 large coriander bouquet, tied

  • Toasted sesame seeds or chopped roasted almonds for garnish

Caramelised prunes

  • 300g soft dried prunes

  • 3 tablespoons honey

  • 1 teaspoon ground cinnamon

METHOD

• In a large casserole, heat the olive oil to medium-high heat and brown the lamb shanks on each side. Make sure the pan is very hot before placing the meat in the pan, you should hear a sizzle when the meat touches the pan, if you don't, it means the pan is not warm enough. The meat will be naturally released once browned, don’t be tempted to flip it earlier. If you try to flip too early, you will notice that the meat sticks to the pan and you might damage it .

• Remove the browned lamb shanks from the pan and set aside. In the same casserole, place the onions and lower the heat to medium. Cover with a lid and leave the onions until they are soft and translucent, about 10 to 15 minutes. This will allow sweating the onions.

• Once you’ve sweated the onions, place the lamb shanks, the garlic, spices, salt and pepper in the casserole. Pour a cup and half of water (320 ml) in the casserole and place the coriander bouquet on top of the meat. Bring to the boil and cover with a lid over medium-low heat. Leave to simmer gently for 2 hours or until the meat is soft and separates easily from the bone.

• Halfway through cooking, after about 1 hour, reserve ½ cup of liquid from the casserole and set aside. At this stage, if it looks like there is almost no liquid left in the tagine, add a few tablespoons (or 1/4 a cup) of water in the casserole to avoid the tagine from drying out and sticking to the pan. 

• Meanwhile, prepare the caramelized prunes. Transfer the prunes in boiling water for 5 minutes to soften them and drain. Then, in a small deep skillet, transfer the liquids you reserved earlier (½ cup) along with the drained prunes, cinnamon and honey over medium-low heat. Leave to simmer for 5 minutes until the sauce starts to thicken. Set aside until ready to serve. 

• To serve, place the lamb shank and the onion sauce in a plate, arrange the prunes and the syrup (from the prunes) on top. Garnish with toasted sesame seeds or chopped roasted almonds. Enjoy with a side of couscous or crusty bread. 

Notes

•  Any type of slow braising beef or lamb pieces, trimmed of excess fat. will work for this recipe instead of the lamb shanks (i.e. lamb shoulder, lamb or beef neck, beef shin). 

dimanche 13 septembre 2026

A natural method for removing tartar

by


Discover a simple and effective way to get a dazzling smile without going to the dentist. Learn how to get rid of tartar and restore the whiteness of your teeth with a surprising home remedy.
Why does tartar build up on your teeth?

Tartar is a buildup of hardened dental plaque caused by food debris and bacteria. Inadequate oral hygiene, a diet high in sugar or processed foods, and insufficient saliva production all contribute to its development. Its formation can lead to gum infections and eventually more serious complications such as periodontitis.

So, how can we reduce tartar formation without systematically resorting to professional cleanings at the dentist?

A simple and effective home remedy

Discover a natural method using common and proven ingredients to remove tartar while preserving your enamel.

Ingredients required

1 tablespoon of baking soda,
1/2 teaspoon of salt,
125 ml of hydrogen peroxide,
250 ml of cold water,
125 ml of lukewarm water.
Instructions

Preparing the exfoliating mixture:
Mix the baking soda and salt in a container.
Wet your toothbrush with warm water.
Dip it in the mixture and gently brush your teeth for about 2 minutes.
Spit it out and rinse with clean water.


see continues on the next page

[page]


Antiseptic rinse:
Mix the hydrogen peroxide with warm water.
Swish the solution in your mouth for 1 minute and then spit it out.
Rinse your mouth with cold water to remove any residue.
Removing stubborn tartar:
Carefully use a toothpick for residue stuck between your teeth.
Rinse with cold water for a refreshing and cleansing sensation.
How often should I use this method?
Use this tip twice a week to limit tartar buildup while preserving the integrity of your enamel.

Other recommendations for optimal oral hygiene

Although this home remedy is effective, it cannot replace good daily dental hygiene. Here are some important tips:

Brush your teeth after every meal with fluoride toothpaste.
Use dental floss to remove food particles from between your teeth.
Limit your consumption of sugary foods, which promote plaque formation.
Stimulate saliva production by eating foods such as apples, carrots, or sugar-free gum.
Visit your dentist regularly for checkups and possibly a professional cleaning.
Did you know?
Saliva plays a crucial role in maintaining oral hygiene. It helps neutralize acids, prevents dry mouth, and contributes to the natural cleansing of teeth. Eating spicy foods can stimulate saliva production, thus promoting better dental health!

This natural technique for tartar removal offers an easy and economical alternative to expensive treatments. By using it in combination with a proper oral hygiene routine, you can maintain a radiant smile and a healthy mouth. So are you ready to try it?

Chef’s Clever Hack for Perfectly Peeled Hard-Boiled Eggs

by


If you’ve ever wrestled with a hard-boiled egg that refuses to peel cleanly—leaving you with a cratered, pockmarked mess—you’re not alone. But chefs and food scientists have cracked the code. The secret isn’t in how you peel—it’s in how you cook and cool them.

Here’s the foolproof method used by professionals for smooth, pristine eggs every time.

🥚 The 3-Step Chef’s Method
1. Start with Older Eggs (Yes, Really!)
Why: Fresh eggs have a lower pH, causing the white to bind tightly to the inner shell membrane.
Tip: Use eggs that are 7–10 days old. They peel far more easily than farm-fresh ones.

2. Steam Instead of Boil (Game-Changer!)
How:
Add 1 inch of water to a pot; bring to a boil.
Place eggs in a steamer basket; cover and steam:
Soft-boiled: 6 minutes
Medium: 8 minutes

Hard-boiled: 12–13 minutes
Why it works: Steam penetrates the shell evenly, creating a micro-layer of air between the membrane and white—making peeling effortless.
💡 No steamer? Simmer gently in boiling water—but avoid rapid boiling, which toughens whites and causes cracks.

3. Ice Bath + Shake Method (The Final Trick)


see continues on the next page

[page]


Immediately after cooking, transfer eggs to a bowl of ice water. Let chill 15+ minutes (cold contracts the egg, loosening the membrane).

To peel:
Gently tap egg on counter to crack all over.
Roll between palms to loosen shell.
Peel underwater (in a bowl of cold water)—the water slips under the membrane, lifting the shell away cleanly.

🌟 Pro Upgrade: Add 1 tsp baking soda to cooking water. It raises pH, further weakening the bond between egg white and shell.

❌ What Doesn’t Work (Despite the Myths)
Poking holes before boiling → Risks cracking and uneven cooking.
Adding vinegar to water → Helps coagulate whites if cracked, but doesn’t improve peeling.
Peeling warm eggs → Membrane sticks more when hot.

❤️ Why This Matters
Perfectly peeled eggs aren’t just pretty—they’re essential for:

  • Deviled eggs
  • Salad garnishes
  • Meal prep bowls
  • Elegant appetizers
  • And with this method, you’ll never waste another egg to stubborn shells.

“Great technique turns simple ingredients into perfection.”
So steam, chill, and peel underwater—and enjoy eggs as smooth as a chef’s pride. ðŸ¥š✨